Thursday, April 19, 2018

My Tim Holtz Stamp Platform arrived! More Best Birds cards.

My Tim Holtz Stamp Platform is here.  Woo Hoo!  I am very happy but it does seem to be a bit smaller than I'd have liked.  Since, I can do the larger 12 x 12 scrap book pages in this one, I think it'll work out well, anyway.


 Here are the stamps placed in the platform.  The grid does help.  I am using the Stampin Up Picture Perfect Birthday stamp set that has the cutest images and words in great fonts.  I'm a real sucker for fancy cursive fonts.  I also used some dies that I found online at Metlockcrafts.com.  They are not in stock at the moment, but they sure are adorable.  It is a set of four birds.  I was hoping they would be the same size as the stamps in the Stampin Up set, but alas they are not.  I did also use a Unbranded floral oval die.  It makes for such a fun statement piece on any card front. 

Then, I simply stamped onto the front and the inside the sentiments and it was done!


Best Birds Birthday Card


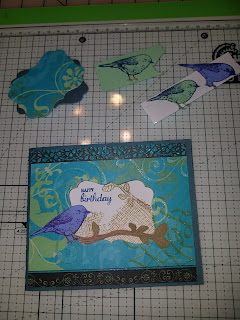
The Best Birds stamp set is so super cute!   I needed a couple of more masculine cards and wanted to try having cut outs on the card front  to jazz it up a bit.  Seems like I can't make enough Birthday cards, ever.  I used an old Michaels DCWV paper pack that was collecting dust on my shelves in the hopes of actually using up some even three or four sheets of paper on these cards.  
 I also drug out my Darice Nesting Rectangles framelit dies for the window opening.  I was going to add some clear acetate but it simply did not need it.  For the coloring and stamping, I used Donna Salazar ColorBox Mixed Media Inks Chox.  These are not available for sale anywhere any longer. Bummer.  I would have liked more colors as I only own six at the moment.

Here is the final card.  I did stamp inside the card for the added interest it gives.

Hugs,
Nina

24Pc. Wink Of Stella Set! &.Sizzix Diamond Cluster Die gets a work out on my craft desk!

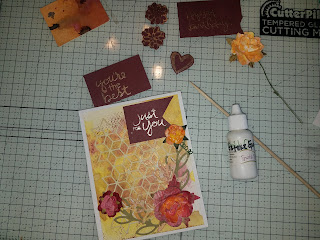
The newest most favorite of my background dies is the (sold only in UK) Sizzix Diamond Cluster Die.   It makes such an amazing effect on the cards I made these past few days.  I used the die cut part as well as the parts that were to be tossed away.  This is a die that requires that you back the paper with some Sookwang Tape.  I own tons of this stuff.  I have widths of this tape from 1/8" all the way up to 6" in my craft room.  My favorite size of this tape is probably the 2" version for the simple fact that it is so versatile.


Most thinlit dies won't cut all the way through the backing paper on the Sookwang Tape, but that is fine with me.  I used some additional tape to adhere the innards of this die cut onto another card front for another fun look.  See the black card below.  I also used some new Unbranded Phrases die set that have many nice sayings on them.  These are found on AliExpress.com.

For some finishing touches, I used some Distress Oxide Inks on Canson watercolor paper 140# Cold Press.  I also used the Stampin Up! stamp set called Watercolor Words.  Then, I went into my sprayed flower stash and found three that have the same colors used elsewhere on card front.  I also had to make a couple of sprigs of leaves that I cut from the Rose Garden Thinlit Dies also from SUp.  

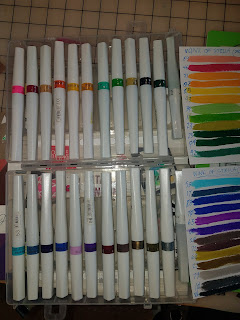
  The roses were colored a bit further to match better using my Big 24 Pack Set of Wink Of Stella Pens.   I'm in sparkle heaven!  I am so impressed by the stunning nature of these pens! 

Here is a close up of the card below.

Friday, April 13, 2018

Trying my Hand At Turn About Stamping

This is the coolest newfangled stamp set I own!  It is Triangle Turnabout by Concord & 9th
They've got some great instructions on their web site and some nice You Tube videos to watch to get you familiar with using it.  The key is that template that I made that you see behind the card front in my Hampton Arts Stamp Platform.  It is no longer available for sale in USA.  You can go over to https://concordand9th.com/ to learn more.  The colors I used were all from Momento Dew Drops Ink.  First, I used the color Pear Tart ink. 

 Next, I used the color Dandelion.
 For the next color, I used the color Bahama Blue.

UGH!  Here is the close up of the goof up.
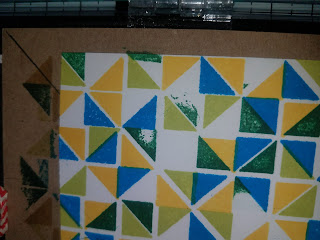
Now, I am going to have to go online and buy the Tim Holtz Stamp Platform by Tonic Studios because you can see in pic above that the stamping was not done well. I think it is because the platform is just not big enough.  You can see how the template is hanging over the edge of the stamping area.  And I had to tape it down at left side and bottom between each rotation (the key here is to rotate the template with the card front temporarily adhered onto it and NOT the stamp as one would think.)  to keep it in place.  But that did not work out too well as my last color was stamped a bit off.  Hmmm, do I really need that Tim Holtz bigger platform?  Well, I just had a Birthday, so why not get myself a gift??  For the last color, I attempted to use Cottage Ivy.

 AGGH!, Somehow the stamping got off a teensy tiny bit and some of the triangles are overlapping others.  What to do?  What to do?  Shall I toss the whole thing out and start over?  NOPE!  I'll cogitate on it a bit and come up with a solution.
Bummer!  Now, all that work is gone to waste!  Wait, what if I can trick the eye into focusing on other details in the card.  Then, the receiver may not catch the flub up on the stamping?  OK, off to my wall o' dies to see what I can come up with.  I decided to try out this Diamond Edge Cut Out Die.  Which I backed up with a yellow crap piece of paper to match the ink color.  That way, it stood out and really grabbed the attention of the receiver.  Pretty tricky, eh??
 Then I simply white heat embossed the sentiment onto the same color of blue paper that I used in the die cut.  Do NOT press to hard onto the stamp with the VersaMark Embossing ink or you'll end up smudging the letters which are super delicate.  For the sentiment, I used the MFT All About You Clear Stamp .  It is a great set to have on hand and now I see that SSS also has one similar to this that actually matches the die that I used, soooo cool.  Do I need it?

 
Then a MFT Stitched Scalloped Circle Frame was cut from {the same paper as I used on the card base}, the NeeNah 80# Classic Crest Solar White paper to set the SSS "you" Wafer Thin Die onto and viola`, it's all done.

Smiles, see you later.
Nina


Thursday, April 12, 2018

A Mini Pop-UP Box card (NOT LF)

Hello, peeps!
 This is a new Mini Scalloped Box card die that I bought from a new web store that I really like. It is Alina Craft No2 store They have great prices and are also a Top Brand Seller on AliExpress.com which is where I first found them online.  This is not the Lawn Fawn branded die as it is much smaller and I have been meaning to try it out.  I can do this Pop up box card at a bigger size on on my Silhouette Cameo 3, but I thought the die set would make me life much easier!  It did, but I gotta tell ya, it was hard to work with such small, itty-bitty pieces of this die set.  The paper is old, from a Basic Grey "Hey You" Collection, a 6x6 paper pad.  This tiny box card just demanded a tiny print in festive colors and patterns, so it worked out nicely.  


Here is the basic box all put together: 

One thing I learned the hard way, do not place the inserts down on the bottom edge of the box as that makes it hard for them to work to hold up those pop up items you'll want to add to the inserts.  The little teeny tiny dies were really useless and I'd not recommend them for placement of the miscellaneous items you wish to place into the box card.  I used stiff clear packaging acetate from my stash.  Lord knows, I buy enough stuff to always have that around.  You do too, don't you??
Here are the two Stampin Up! stamp sets that I've used for the tiny little items to place into the pop up box.  They are Birthday Bannners and also Super Duper
The final card turned out to be smaller than I'd have liked.  With all the work required to get it done, I would make it only for the most special people to receive. 

This is how it will look when folded flat to fit into the envelope.  It is super fun but too much work at this mini size.  That said it is a great die set that cuts cleanly and makes a terrific special card.

Hugs for now,
Nina

Wednesday, April 11, 2018

More Easter cards.

These are the last of the Easter cards I made this year.  I had given them to my family and some I was able to procure back to take a picture of so I can share them here.  This is a die set from AliExpress called, Lucky Easter Eggs and it has some great Easter eggs in it.   Plus, that word, "Easter" is in such a great font.  I wanted to use it on interior of the cards--but, alas, it was too big.  

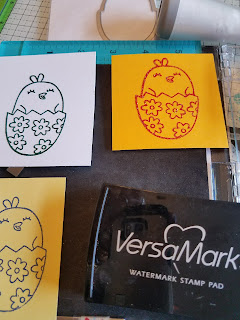
 This little chickadee is from the 2017 Sale-a-Bration stamp set called Honeycomb Happiness Chick.  I wish I had bought two of these sets they are so adorable.  Since, they did not come with dies, I had to buy some fussy cutting scissors to make life easier.  Some gals say they can cut out images they've stamped while watching TV.  Ha, ha,ha!  I couldn't do that if my life depended on it.
 I colored the little guys using my Wink of Stella (WOS) pens in a couple of shades of yellow and left the center of his belly colorless and just went over that with Clear WOS.  I hand cut out the tree to hang the eggs off of and this was the completed card below.  I've also used an old S UP stamp set called "four frames". for the sentiments on the front of cards.  Love that old set.  One of my Darice Nesting Rectangle dies even cuts out those frames perfectly.  I accidentally gave that card away before I got the picture taken.  Rats!

The card below was also simple and again I used one of the little chickadees from the Stampin Up set mentioned above.  I colored it in the same way as I did before using my WOS pens. The grass was cut using Lawn Fawn's Meadow Border die set.  There is that Easter word die cut on the front of this second card as it is a nice focal point to the card.  The scalloped rectangle die set was cut from Neenah 80# Classic Crest in Solar White as there was already an explosion of colors going on.
Wouldn't you agree?
  
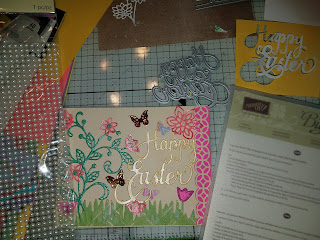
The next card is another one using mostly the same items as the one above,  I switched out the background die and used a couple of the dies from Stampin Up! Flourish Thinlits backed with some Metallic Collections 65# Neenah Paper .
I also found some use for the big pack of 3mm adhesive backed pearls from Recollections.  I don't know what possessed me to buy such a large pack, I'll never get them all used up.  You ever have such purchases that make you scratch your head in wonder at what you were thinking when you bought them?  I cut some of the Joy! Crafts Butterfly Border die off the edge and used the smaller ones only.   The "Happy Easter" die was bought late last year and unfortunate;y is sold out now.  Sorry.


Here is the finished card:


This next card came together very simply.  I used some Distress Oxide Inks (colors from the Ranger 2nd release of 2017) and then two different die cuts.  The Rectangle Background Frame Cutting Die is such a great Unbranded die for the $3.56 on www.Aliexpress.com.  It really makes card making a snap. The Fairies & Bunnies die came from Craft Mode.  Isn't the one with the fairy sitting on top of the mushroom with the bunnies underneath her so adorable?  All it needed was a touch of Shear Shimmer Spritz.  I used Neenah 80# Classic Crest in Solar White.  This is the same paper I usually use for die cutting as I like it's heavy weight.  The other papers used on this card are old ones and from my stash.

Hugs, Bye for now.
Nina


Sunday, April 1, 2018

Easter Cards

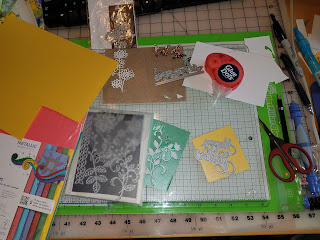
Here are some of the products used to make cards for family this Easter.


The final cards came out mostly nicely.  The stamp and die set is from an old Hampton Art (HA) & Sizzix framelit die & stamp set. There is no link for currently available product as I got it back in 2013! The GLITTERY embossing powders are an older set of five from Stampendous Co and a Gold one from Ranger Ink.  I also used some of the Distress Oxide Inks colors to make the backgrounds using some Tim Holtz/ Ranger watercolor paper (118#, cold press).  It was a total fail to stamp and emboss using the gold embossing powder directly onto the background watercolor paper as it did not show up too well.  I say, maybe use a different color of embossing powder, black or white and it may show up better against all the various background colors. 
This one uses a great fancy floral banner die (no idea where I bought this one) which is stamped with the greeting and that is all the frill that the card needs.  This wildflower banner die is so awesome, I'll keep on looking for the Brand and get the link up here soon. The insides of these read "You're Tweet" or "to my favorite peep" which are found on that that HA Chick stamp set.  
Unfortunately, I already gave away a lot of the cards I made but here are a few that have yet to be mailed out.
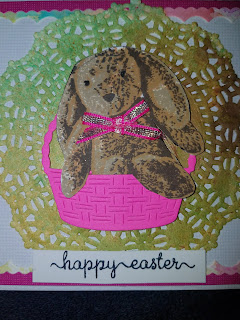
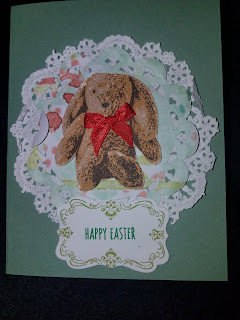
These first two have the Stampin Up! layered stamped bunny from the Sweet Little Something stamp set which I placed into the Memory Box Woven Basket Die.  The doilies were sprayed in the first card with some Lindy's Stamp Gang spray mists.  The sentiments are from the All Occasions (not sure of brand on it) stamp set in that beautiful cursive font.  

 The card below is quick--just a beautiful background Decorative Oval Lattice die from Heartfelt Creations.  An oldie but a goldie.  I also dug out my old Four Frames Stampin Up! stamp set for the cute labels above and below.
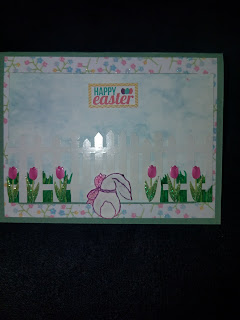
 This card below I scalped the card front off of a card I received from my crafty friend, Rebecca.  Isn't it so sweet?  She loves to use stickers and does a great job of it.  I can't believe the whole thing is made entirely of stickers!  Amazing talent that lady.
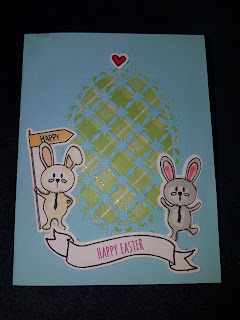
 More uses of the lattice die mentioned earlier. and theBeach Bunnies stamp set from My Favorite Things.  They were colored using my Spectrum Noir alcohol markers and turned out quite adorable.  I also used a touch of my ZIG Wink of Stella GLITTER CLEAR Brush Tip Marker to add some shimmer to their bellies.   The adorable BANNERTASTIC Clear Stamps and Dies banner stamp and die set was recently bought and it has come in very handy.  The sentiments are from the Tim Holtz Stamper's Anonymous All Occasions stamp set, an old favorite.


 Thant's it for the Easter cards that I have to share for today.
Hugs,
Nina

Claiming it on Bloglovin

<a href="https://www.bloglovin.com/blog/20588129/?claim=snqscfx3kga">Follow my blog with Bloglovin</a>