Thanks for stopping by. I know it has been a long time since I last posted but here goes. Life got in the way of blogging.
So, I needed some cards for the boys/men in my life for Birthdays and such. I was hoping they could be manly and generic enough for many different occasions.
I have to apologize in advance for the sideways photos found in this posting. I am very sorry if it bothers you. And since only a couple of people actually read this blog, I'll fix the photos coming over from my iPhone sideways. It has to do with the iPhone's IOS and my Windows PC not "talking" the same language. I have to upgrade one or the other or both. Another project for another day, but now let's get onto the card making.
I've decided to try to make a few from this Stampin Up! retired "Wetlands" stamp set as it has just been collecting dust here in my craft room. You can still get it on EBAY if you're inspired. I did take a couple of days to get these done, so, it is a longer process for cards, but definitely worth it.

The idea I had was to stamp the images allowing some of the image to go off the sides of center card stock. So, the first thing was to cut all the layers for the front of cards. Using some of the card stock that I've got in my stash, I kinda got a bit carried away, eh?

Stamped images turned out pretty well. The use of the Tim Holtz Stamping Platform is the key. This tool makes it so easy to stamp several images one, right after the other in sequence without any fuss. I placed a piece of copy paper as a back drop so I could stamp off the edges of card. I used a pencil to demarcate the card edges so as to line them up well each time.

The ink for this stamp was Momento Ink in Tuxedo Black. I figured it was best in case I wanted to add water drops onto the Distress Oxide Inked pages later on.

Here is the group of cards all stamped up.

Ready now for the coloring of these pages. I'll use Tim Holtz Disress Oxide inks to color the images quickly, and then use some of my many background dies to emboss the paper before placing it carefully back onto the card front. See the pictures below for colors used.


Then, the next thing was to choose some of the "ocean themed" background dies that I'd use to emboss the card fronts. I selected several nice ones that will be terrific if, they don't tear through the paper when I try to emboss. The white paper is only 65# basic white card stock so let's keep our fingers crossed. Dang, I think this is not going to work...


OH, no, just as I thought, the paper was too thin. So, since, I've already done the card fronts up with the stamping and inking, I'll have to change the "sandwich" of the cutting plates used in my Sizzix Big Shot. I've got many more of these cards to make.


I will use these card fronts that have been cut through, but sticking them down onto the layered cards was a pain!

Another thing you'll notice if you look closely, is that the stamping did not line up on the layers of the card front. UGH!! I am horrible at card making but I must persevere to have some more masculine cards in my arsenal. I think I can go back to some of my cheating behavior of my early stamping days and just add a black line using a Sharpie Fine Point Black marker to the bottoms of the reeds to have the stamping match up better.
Before the Sharpie trick:

After:

Ok, now to add on the sentiments that I have stamped earlier. I find it is easier to stamp a bunch of different ones and then keep them with the cards so I can decide which one to use to suit the occasion I need a card for.

I'll have to use some dies to get these into more manageable sized sentiments for the cards. These are MFT Die-Namics Stitched Elegant Rectangle Stax Die Set and another generic set (could be Crafter's Companion, SpellBinders, or Elizabeth Craft Designs) that I've had for a long time and it's nice to see they are now finally going to be used.


The other cards I did not actually stick the sentiments onto yet, as I'll keep it flexible and do so as needed.
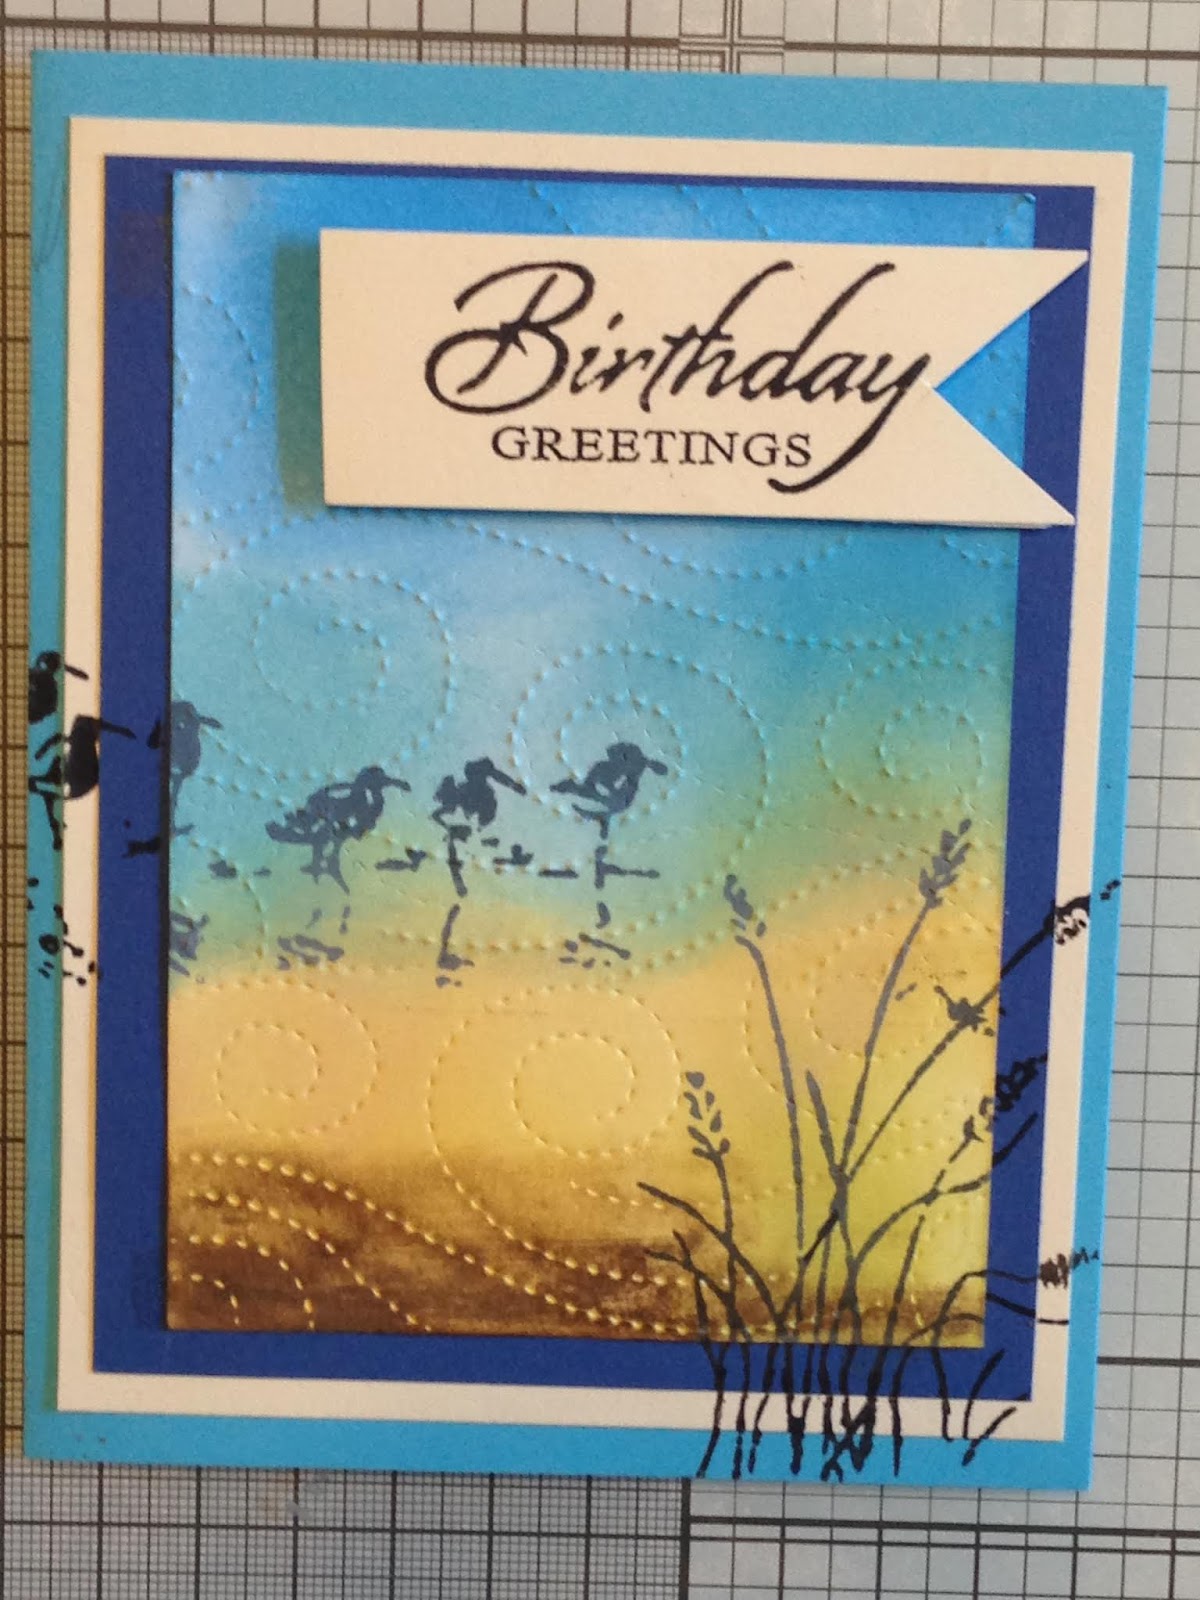
This one I added a bit of brown {Tim Holtz Distress Ink in Walnut Stain) in the sand dunes so it could qualify for the Color Throwdown #528. I always find it inspiring and hope you will too. This week the colors are aqua, saffron, brown and yellow. The website is so fun and I spend/waste a lot of my free time pursuing it. Go check out the site for yourself: https://colorthrowdown.blogspot.com

I'm also going to try my hand at more challenge blogs this year. It is not easy to do this as mostly I think of it after the fact, but, this site has to be one of my go to sites for card making: Addicted to Stamps #326. The idea is to use one of my favorite challenges- "Anything goes"- which is great, as this website is so amazing! You have a few hours to spend--go look it over, you'll like it.
Another cool site is Through the Purple Haze #152. You'll find lots of inspiration there too. I do think that the challenge this week is to use your favorite color combinations, that is so easy and guess what? These colors are some of my favorites to use together. Yeah!
A new site for me to explore is Watercooler Wednesday Challenge Blog #206. I am so impressed so far with how lovely the projects posted therein are. They are also going with the "Anything goes" theme so I'll be linking up this blog over there too.
Here is one more blog to go spend some time on, Crafty CardMakers. They are looking for people to use texture this week and so why not link myself up there too, right? That use of the dies as embossing elements is the ticket!
Here is the end result of the other cards I made this past couple of days:
This one I added a bit of brown {Tim Holtz Distress Ink in Walnut Stain) in the sand dunes so it could qualify for the Color Throwdown #528. I always find it inspiring and hope you will too. This week the colors are aqua, saffron, brown and yellow. The website is so fun and I spend/waste a lot of my free time pursuing it. Go check out the site for yourself: https://colorthrowdown.blogspot.com
I'm also going to try my hand at more challenge blogs this year. It is not easy to do this as mostly I think of it after the fact, but, this site has to be one of my go to sites for card making: Addicted to Stamps #326. The idea is to use one of my favorite challenges- "Anything goes"- which is great, as this website is so amazing! You have a few hours to spend--go look it over, you'll like it.
Another cool site is Through the Purple Haze #152. You'll find lots of inspiration there too. I do think that the challenge this week is to use your favorite color combinations, that is so easy and guess what? These colors are some of my favorites to use together. Yeah!
A new site for me to explore is Watercooler Wednesday Challenge Blog #206. I am so impressed so far with how lovely the projects posted therein are. They are also going with the "Anything goes" theme so I'll be linking up this blog over there too.
Here is one more blog to go spend some time on, Crafty CardMakers. They are looking for people to use texture this week and so why not link myself up there too, right? That use of the dies as embossing elements is the ticket!
Here is the end result of the other cards I made this past couple of days:


That's it for today! It's a long post but I hope you stayed to the end and got some inspiration. I'll hope that life is back to normal for a bit so I can be a more frequent blogger.
Hugs,
Nina


Love your card and the detailed post!
ReplyDeleteA lovely textured card (s). Love the stamp set you used, your colouring and the embossing, all wonderful. Thanks for sharing with us at Crafty Cardmakers for our 'Texture' challenge.
ReplyDeleteGlenda DT xx
You are very hard on yourself Nina! I think you created a wonderful set of cards. The ink blending is gorgeous and the finished cards are great.
ReplyDeleteThanks for sharing with us at ATSM and I hope you will join us again soon.
Wow! They all turned out so nicely different! Thanks for joining us at Watercooler Wednesday Challenges!
ReplyDeleteGreat cards! Love reading about your process. That is truly a classic stamp set and you have put it to good use. The embossing really adds a lot to the design. Thanks for joining us at Watercooler Wednesday.
ReplyDeleteWonderfully created set of cards!! Love how you used the colors! Thanks so much for joining us at the Color Throwdown this week!
ReplyDeleteI love your card, you are an incredible crafter! Thanks for sharing at ATSM!
ReplyDeleteA beautiful set of cards. Thank you for joining the add some texture challenge at Crafty Cardmakers.
ReplyDeleteMary
Thank you for joining in with my challenge at Crafty Cardmakers this time. These are great cards - and I really, really like the effect where the paper has cracked. Gorgeous!
ReplyDeleteJackie x