Thursday, July 30, 2020
Claiming it on Bloglovin
<a href="https://www.bloglovin.com/blog/20588129/?claim=snqscfx3kga">Follow my blog with Bloglovin</a>
Wednesday, March 6, 2019
Masculine Dudes and the Clover Background die
Oh, thanks for stopping by and as always, thanks for commenting on my endeavors here. I do so love reading your quick notes and comments.
Here is the preview of the card: I'm going to make a few of these more masculine, funny and hip cards for my young nephews.


Ok, so you are probably waiting to hear about the stamp set. It is the Dude Stamp Set by Impression Obsession. It is great! The artist is Dina Kowal and her blog is awesome.


On this card I used the parts/ pieces of two different colors of cardstock cut from the Layered Medallions Cover Die B alone.


It was tedious to do the Glad Press N Seal method on this set, as there are many tiny bits to worry about getting properly placed/ stuck onto the Glad P&S wrap. Do persevere, it is worth it as you can get more from each of these cover plate dies that you invest in if you spend time doing this instead of throwing away those tiny left-over pieces. More info on this technique is found on my prior posting:
Getting started on the St. Patrick's Day cards with a clover background die.


Here is the preview of the card: I'm going to make a few of these more masculine, funny and hip cards for my young nephews.

So, in my last posting I mentioned that I had a nice, but untried Flower Background Die from The Ton. I mistakenly attributed them to The Ton Stamps, but they are an AltENew product. I used the Altenew-LAYERED-MEDALLIONS-COVER-DIE. I do know these are still available even though I got them long ago. Get them today!


Ok, so you are probably waiting to hear about the stamp set. It is the Dude Stamp Set by Impression Obsession. It is great! The artist is Dina Kowal and her blog is awesome.

I used my Hampton Arts Stamp Position Tool to do the stamping and I wish I has stamped more of all those very clever sentiments! I used a favorite ink, the Momento Tuxedo Black Ink


Getting started on the St. Patrick's Day cards with a clover background die.


I put the little green pieces back into this white frame and still have the little white pieces to work with on another card design later. That's what I call a Win-Win! To do so, I had to first make the entire back of the white frame die cut become sticky and this is best achieved by using good old 3" Sookwang Tape. This is great stuff! I use it daily for all kinds of things. Love it. After applying tape to the white frame die, I just inlaid those green bits back into the sticky surface of the tape. Then I simply peeled it off the back and applied it to the card front.

Viola~

Then to place the stamped image and heat embossed. I did this using Ranger detailed black embossing powder. I used this method for both sentiments and it is all finished. Nice & easy too.
Card challenges I've entered this into:
1) The Card Concept #110:
2) Sweet Sketch Wednesday No. 2 #155:
3) The Male Room #106
Thanks for reading this and for all your kind words, and have a great day!
Nina
Friday, March 1, 2019
Getting started on the St. Patrick's Day cards with a clover background die.
Hello, thanks for joining me here as I create a quick card for St Patrick's Day. I am not Irish, but it is fun to get in the spirit anyway!
Here is my card as a preview to the post. I think it is quite striking (your thoughts?) but, this card was really very simple to construct. It seems to me the many background layering dies our in the marketplace these days are the best way to get more pizazz with less fuss! They are expensive but they sure are worth it to make a stand out statement without too much stress.

I used the Flower Layers Cover Up Background die set by The Ton. I don't believe these are still available as I got them on sale last year, but not in time for making any St Patrick's Day cards.


Since 99.99% of the teeny tiny cut pieces stayed in the card stock after the die was removed, I very carefully turned the whole thing over and placed Glad Press N Seal over the front of the pieces to hold them in place.


Mind you, you have to be so careful when peeling back the large die cut cover part of the paper away from the extraneous tiny pieces of the die cut image. Do it slowly. You may have to keep pressing down into the Glad Press & Seal plastic any loose bits that want to come up with the main die cut image.
On both of the layers (A & B dies).


This is what will be remaining on the Press & Seal:


Also, to help in cleaning up glue on glass, this handy dandy little hardware tool works wonders.

For the sentiment, I had some extra ones of these stamped and embossed from last time (see prior post) so, I decided to use it.

This big sentiment is the one I choose to use. Stamping and embossing onto the heavy weight vellum is the best way to showcase the die cut layers without getting them all covered over. I like that this sentiment can go for all kinds of occasions and it could be so suitable for many of life's best happy moments!

The final result:

The card challenges that this card will go in for are:
 |
2) As You Like it Challenge #  |

Thanks for stopping by,
Hugs,
Nina
Friday, February 22, 2019
Background dies Rule!
Hello, friends, Thanks for joining me here on the blog. Here are the cards I've made today:
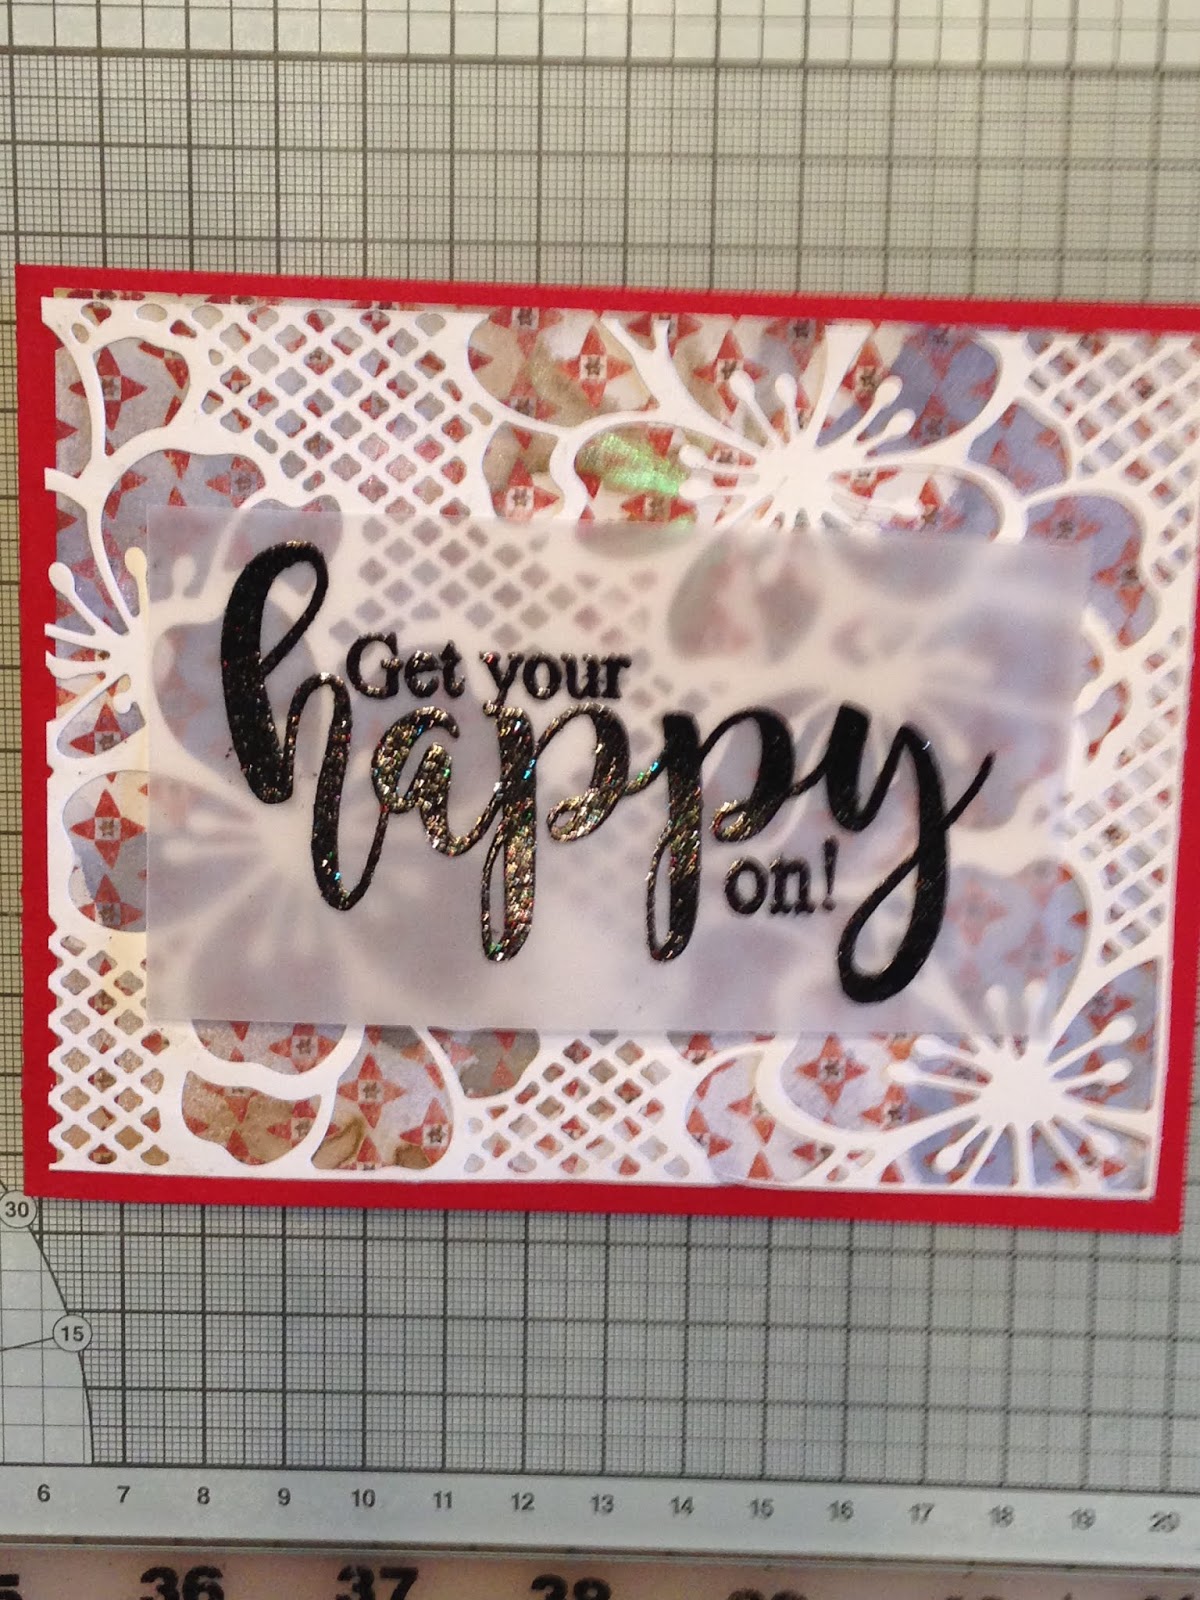
This one has a bit more going on as I wanted to add a little die cut to match the flowers in background die.

Here is the die that I used and it was so fun to flip it over and see "the reveal". It is so intricate and amazing. I used some heavy 80# Neenah Classic Crest paper in Solar White. I find that the more intricate the die, the more benefit I get from using heavier paper.

I then placed a bit of Glad Press N Seal over the front; such that when I flipped it over, all of the tiny pieces stayed in place. I'll use this for replacing the little itty-bitty white card pieces onto another die cut background for another card soon.

Now, to glue down the die cut piece. I tried a few of the glue pens that I own to see which would work best. It turns out, the Nuvo Glue Pen works the best to apply over the back of the paper but not show up on the front at all.

I dug around my craft room and Eureka! I found some previously sprayed paper from 7 Gypsies that has just the right amount of detailed design and the right colors too!

OK, onto the stamping. I liked this stamp by Stamps by Me called "Get your Happy On". I don't think they still sell this one, but there are many other nice sentiment stamps available there.

I heat embossed the sentiment onto heat resistant vellum using my Hampton Arts Stamp Positioning tool. This one is smaller than the one by Ranger in Black Sparkle so I reach for it more often. I also usually like a bit of sparkle in my cards so I have a few Black embossing powders which contain mica or glitter as seen below.

It is hard to capture the dark glitter-ness of this powder on camera but if you look close, it is super shiny and sparkly.
This is another favorite from Stampendous PearLustre in Hematite. It is just the right amount of sheen to a project.


You'll notice that the dot on the exclamation point is missing and so I just filled it in with a fine tipped Sharpie pen.
Now to stick the vellum onto the card front. I did fuss about for a long time deciding where to place the words, I ended up placing it near the bottom of card.
The very best vellum adhesive in the world is made by Plus. You won't believe how it just disappears behind the vellum on all manners of card stocks.

This is the cute little Memory Box Perky Poppy flower die. Love how sweet it is when cut out so, I cut it out twice and then one die cut can be backed with that same sprayed background paper that I used on the card front.


Here is the way the cards turned out:


Challenges I'll enter that fit today's cards:
1) Crafty Catz #450

2) CAS on Friday #152

3) Simply Create Too #146
Thanks for stopping in and see you around.
~Nina
Subscribe to:
Posts (Atom)
-
 Thanks for stopping by. I know it has been a long time since I last posted but here goes. Life got in the way of blogging. So, I needed ...
 -
 This die set by AltENew called PEONY-DREAM-3D-Die is quite a stunner! I used an old Darice Embossing Folder with zig zag lines on my ...
 -
 Hello, thanks for joining me here as I create a quick card for St Patrick's Day. I am not Irish, but it is fun to get in the spirit an...